Link Accounts & Integration P3
Hello,
This is part 3 of Linked Accounts & Integration. continuation of P1 and p2
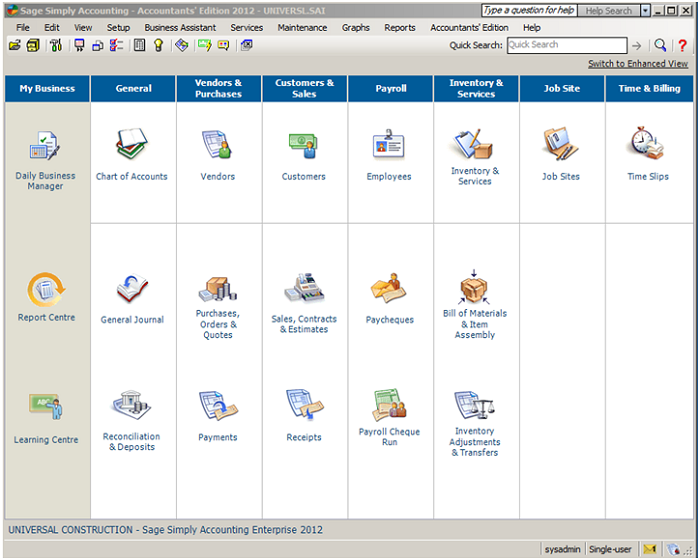
Lets get started. Click on Payroll. there are 10 sub categories that will be covered.
Note: keep in mind depending on the version of Sage some of these categories might not appear.
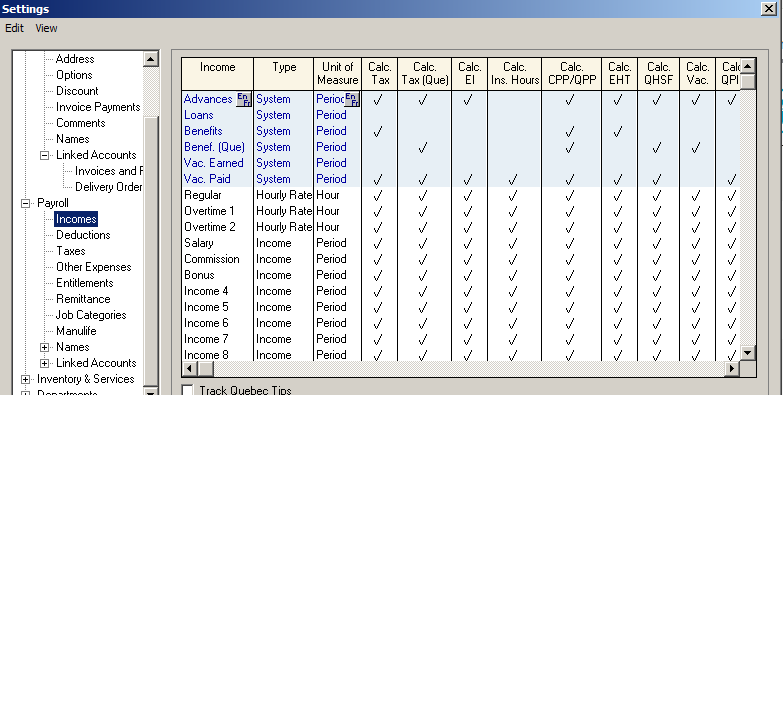
Next: Income
The shaded area can not be changed. There is regular, Overtime1 for 1.5% of regular wages and Overtime2 for 2 time the regular wages.
Income 4,5,6 etc can be changed to any other income categories such as piece work or one time severance pay or Xmas pay.
Going across the Colum each income category is checked off with the appropriate tax deductions.
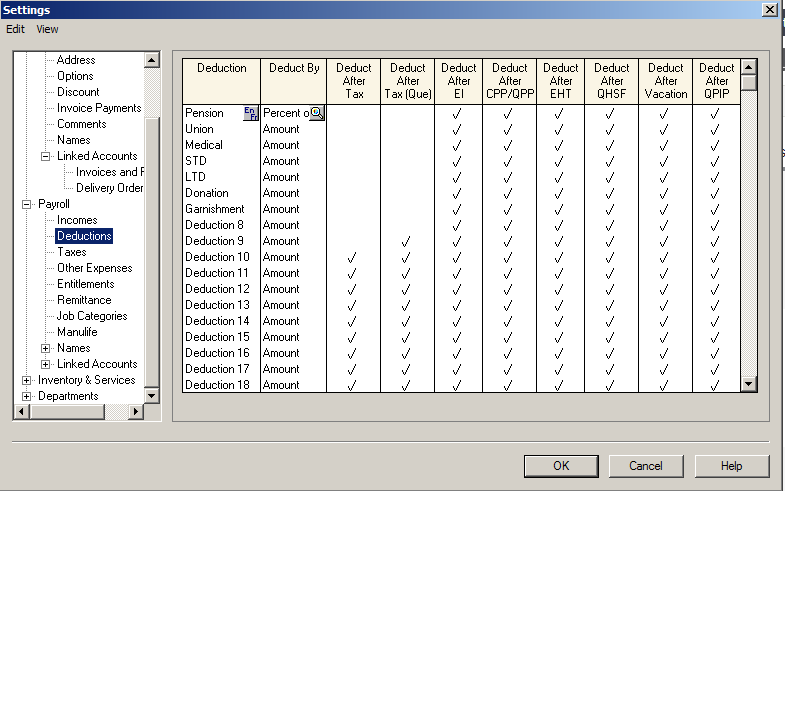
Next: Deductions
Enter all the appropriate deductions you may have. These will be set up on payroll and come off each pay period. Let the system know if any of the deductions are subject to government taxes.
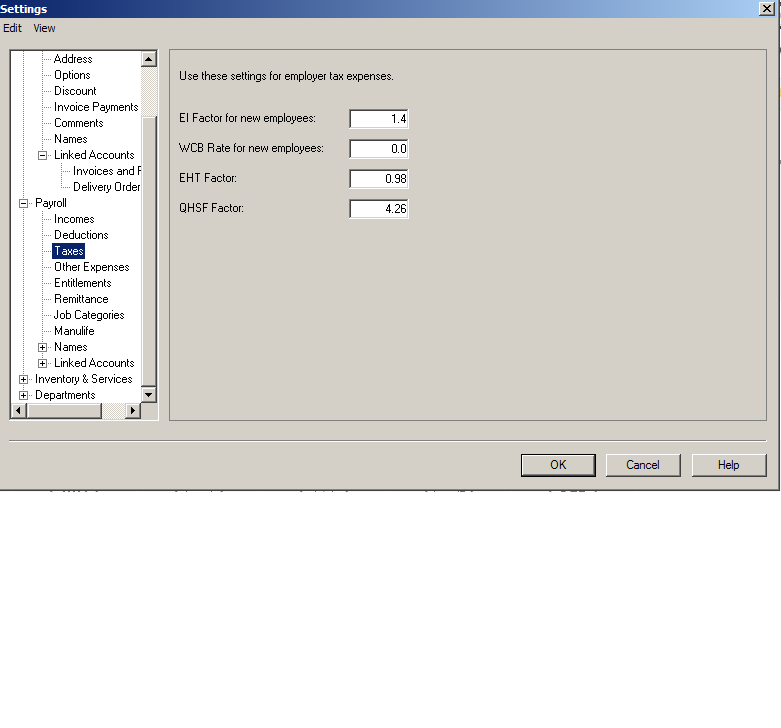
 Next: Taxes
Use this section to calculate Employer portion of payroll tax remittance.
 Next: Other Expenses
this section is self explanatory. Enter other expenses that you need to take off employees paycheque weather is amount or percentage.
Next: Entitlement
Employees sick, special, or any other day they may have can be tracked here.
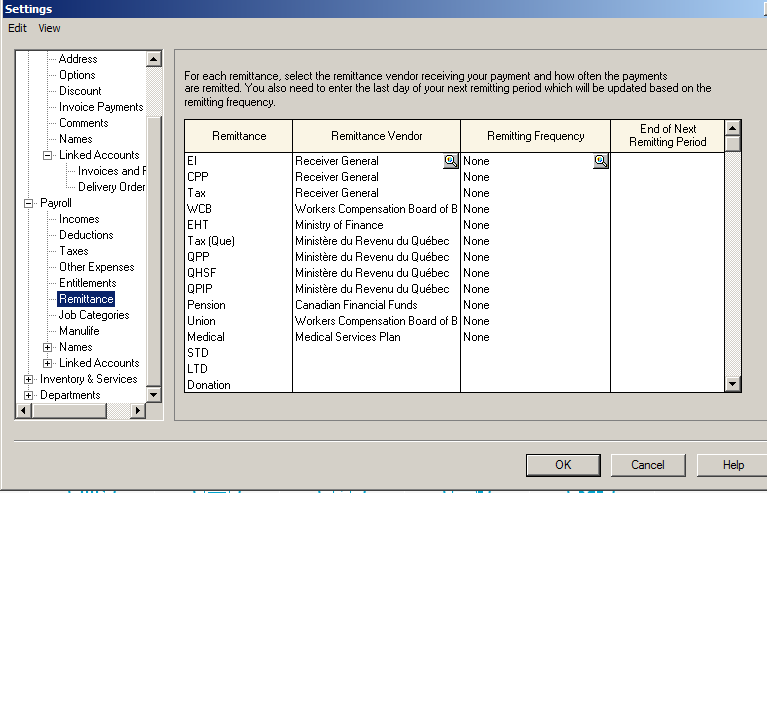
Next: Payroll Remittance
For each remittance select the vendor receiving payment.
Next: Job Categories
To add or change job categories fill in the information.
Next: Manulife
This is a extended health company for medical, RSP, or pension setup.
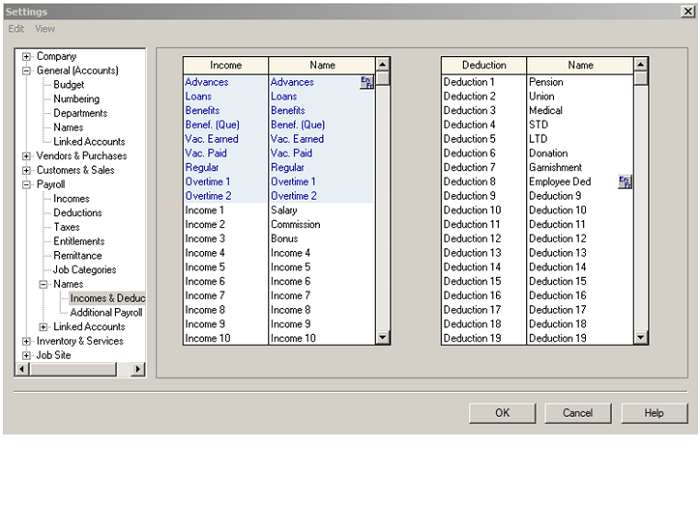
Next: Names – 2 sub categories.
1 – Income & Deductions
The blue section can not be changed. Income & Deductions 1 – 20 can be changed to your company’s preference.
2 – Additional payroll
this is additional info and title section can be utilized for your own wording and definitions.
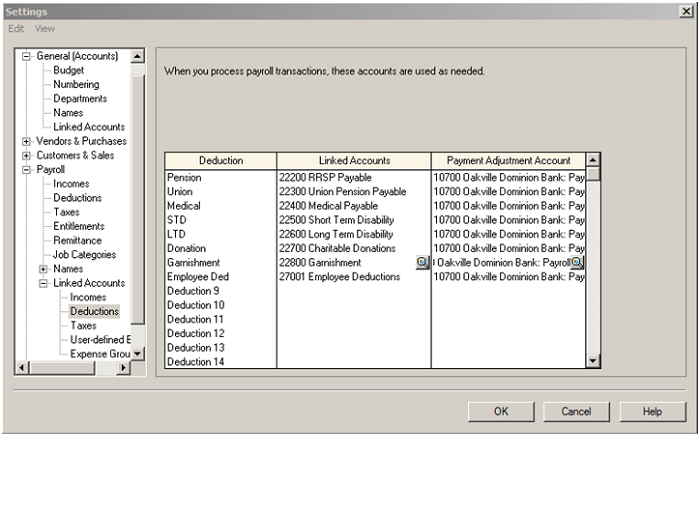
Next: Linked account – 5 sub categories.
Income, Deductions, Taxes, User-defined Expenses and Expense Groups
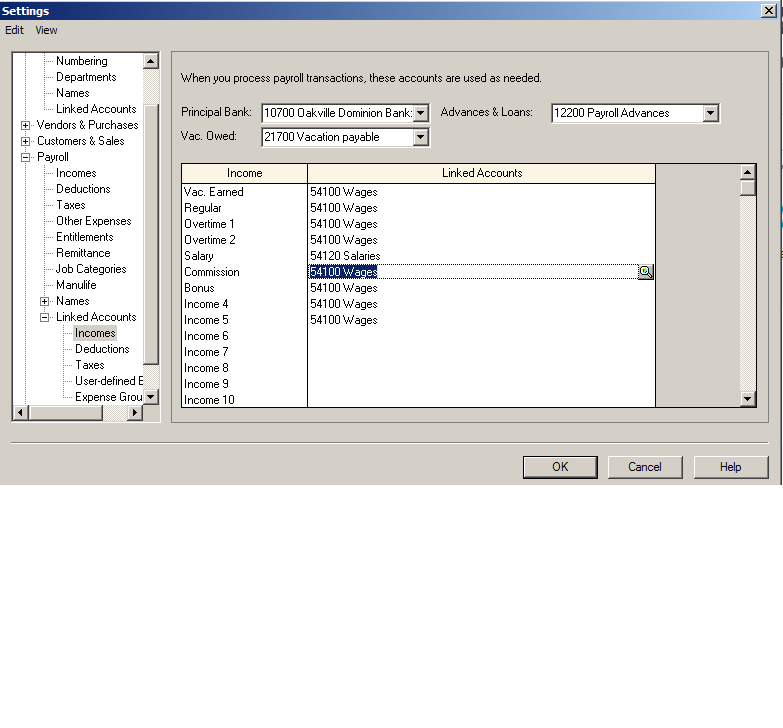
Next: Income
from top – Insert the bank that payroll will be coming out of. Account to keep track of vacation owed and account to track payroll advance.
the wages account number is issued to all wage categories except Salary has its own account number.
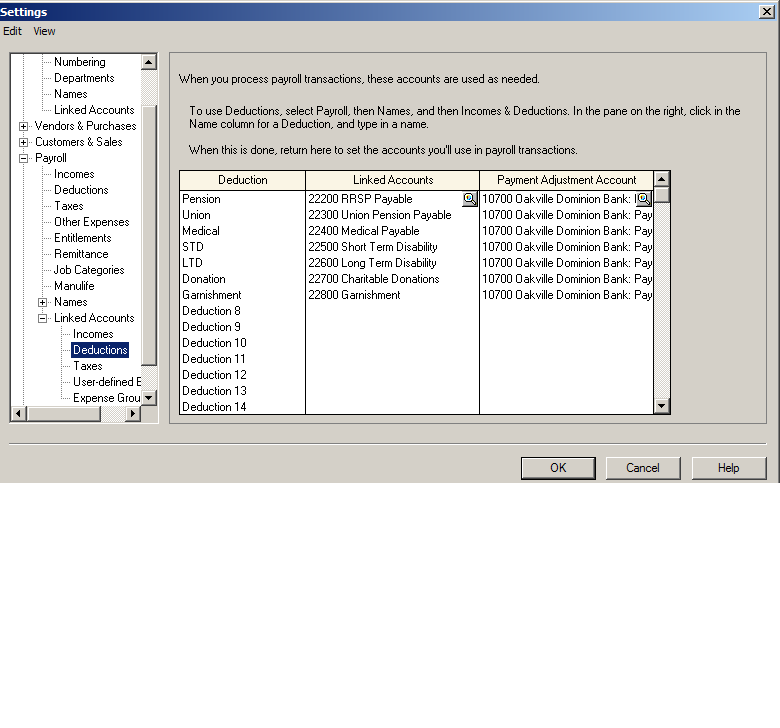
 Next: Deduction
Enter all the payroll deductions account to balances every time payroll is processed.
These account should be reviewed each month and the balances remitted to government and other institutions.
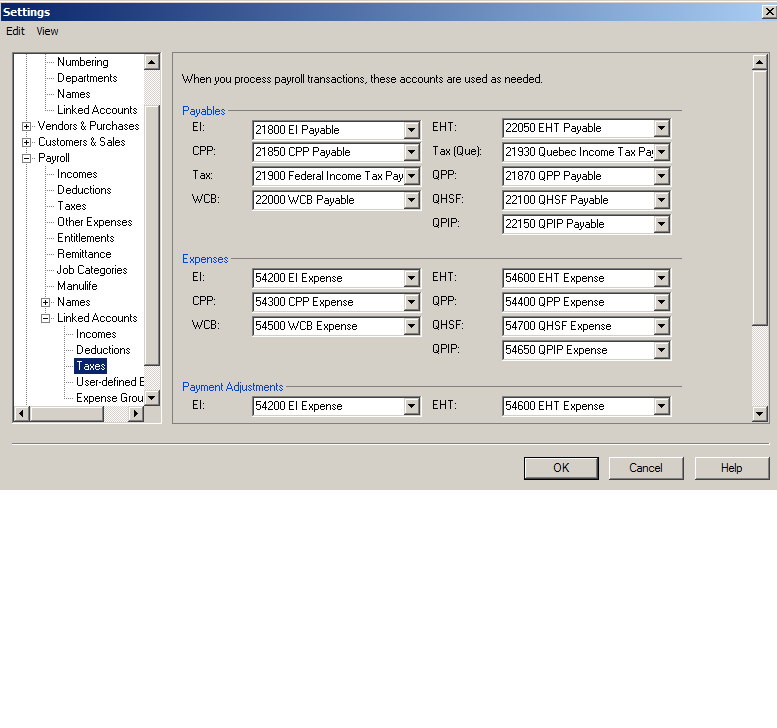
Next: Taxes
Every time payroll is processed the deductions will be held in these account. both the employee and employer portion so you don’t have to do extra calculations to capture 1.4% for EI and 2x CPP. Its already done for you.
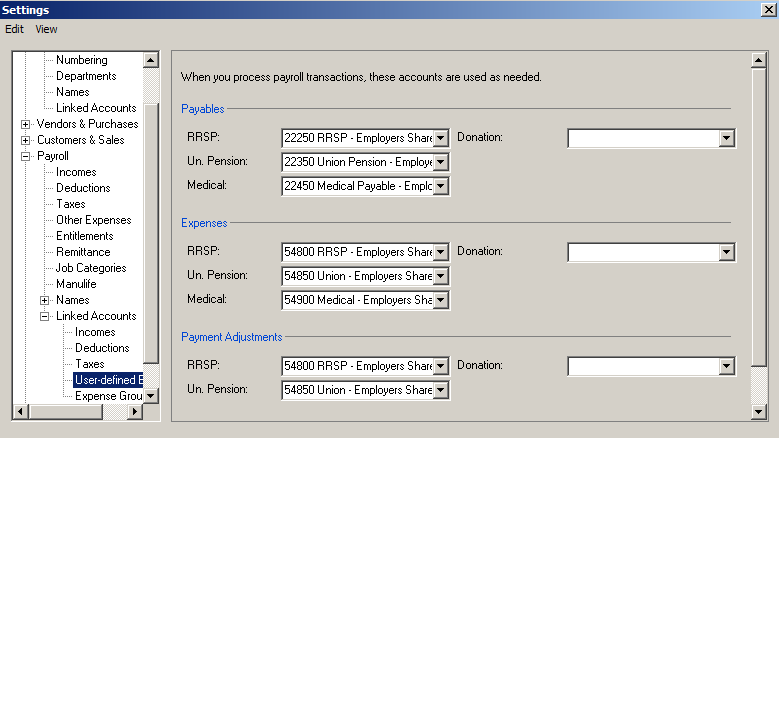
Next: User-Defined Expenses
When payroll is ran these accounts are used to process the payable section as well as the expense portion of the entry. The ones your company does not utilize can be left blank.
This concludes the Payroll setup and all the linked accounts to run payroll smoothly.
if you have any specific questions please drop me a note.
Hope this was helpful.
nk
Payroll Deduction
Hi Everyone, I get lot of questions about sage 50 Simply Accounting payroll deductions and income so; I decided to write a tutorial. There are four steps on how to set up a payroll deduction or income. This tutorial will be in the classic mode of Sage 50. Just like any other deductions such as source deductions, extended health or RRSP deductions you have to set up an account in the chart of accounts to track because at some point you need to pay the amount you are deducting to an individual or government agency.
Step 1 – Create the account to track in the chart of accounts. Open your sage 50 Simply Accounting program and on the home screen click on Accounts or Chart of Accounts depending on the version of Sage 50 you have.

Click on File – Create. In the 2— series liability accounts create an account to track deductions and in the 5— series expense account create an account to track income. Under Type choose Group Account. Save and Close.

You have now created your account and ready to link this account to the payroll module.
Step 2 – On the home screen, click on Setup – Settings, Payroll, Names, Income & Deductions. Notice I have changed Deduction 8 name to represent Employee Ded. You can also choose an available income category and change the name. Click OK.
Step 3 – You now need to assign an account number to the deduction or income name you just created. On the home screen, click on Setup – settings – Payroll – Linked accounts – Deductions. You can also choose Income if that is what you need to setup. Assign the account number you created in the chart of accounts as a linked account to track the deductions you will be taking off the employees pay cheques.
4th Step – on home screen, click on employees – and choose the employee.
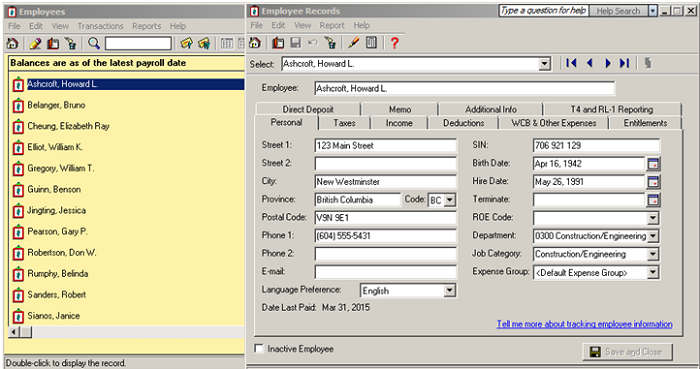
On the employee record screen click on deductions tab. Put a check mark in the Use colum and include an amount in the Amount Per Pay Period colum. Save and close.

This concludes our tutorial session. If you have any questions or comments click on the link below. http://www.simply-accounting-tutorial.ca/ask-questions/ask-questions and scroll all the way down the page.