Linked Accounts & Integration P2
Hello,
This is a continuation of P1 which talked about Company. under the Setup – Settings menu. the link is below for your review.
Lets continue with the tutorial. This section will look at integrating and setting up General (Accounts), Vendor & Purchases, and Customers & Sales.
General (Accounts)
Under General (Accounts) there is Budget, Numbering, Departments, Names and Linked Accounts.
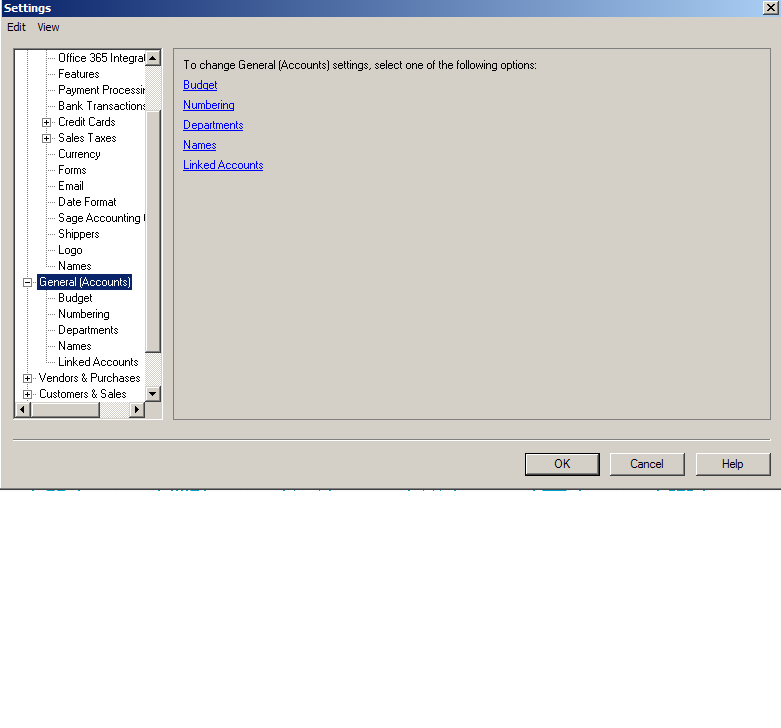
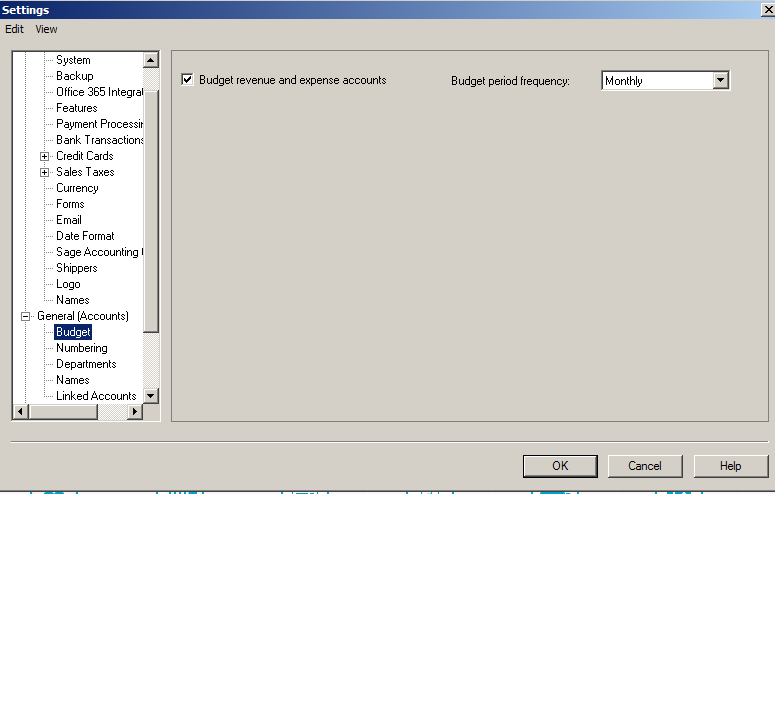
lets look at Budget
you can set up a budget for each of the accounts. A detailed and realistic budget is one of the most important tools to guiding your business and providing the information necessary to operate within your means.
 Next: Numbering
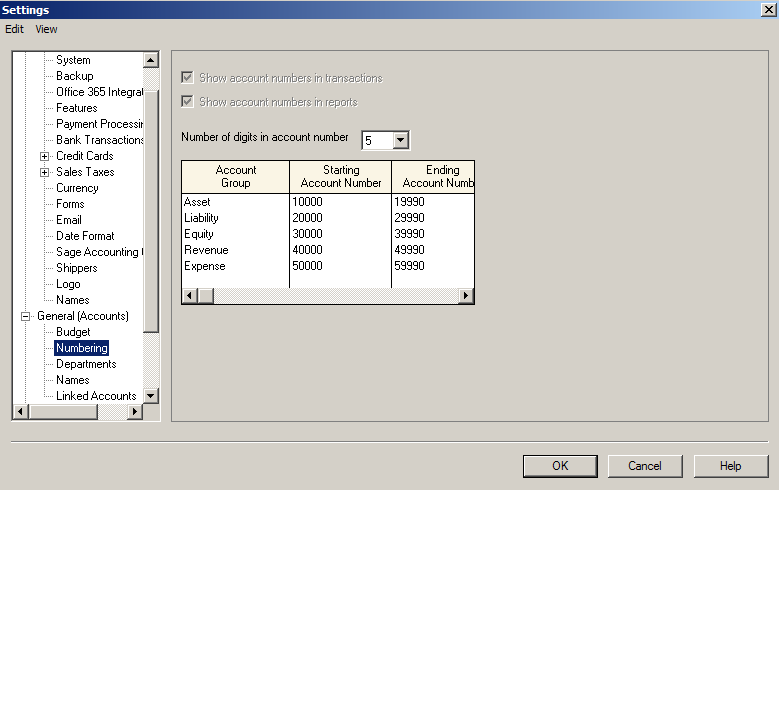
In Sage you can have a 5 digit account numbers and here you can specify the range.
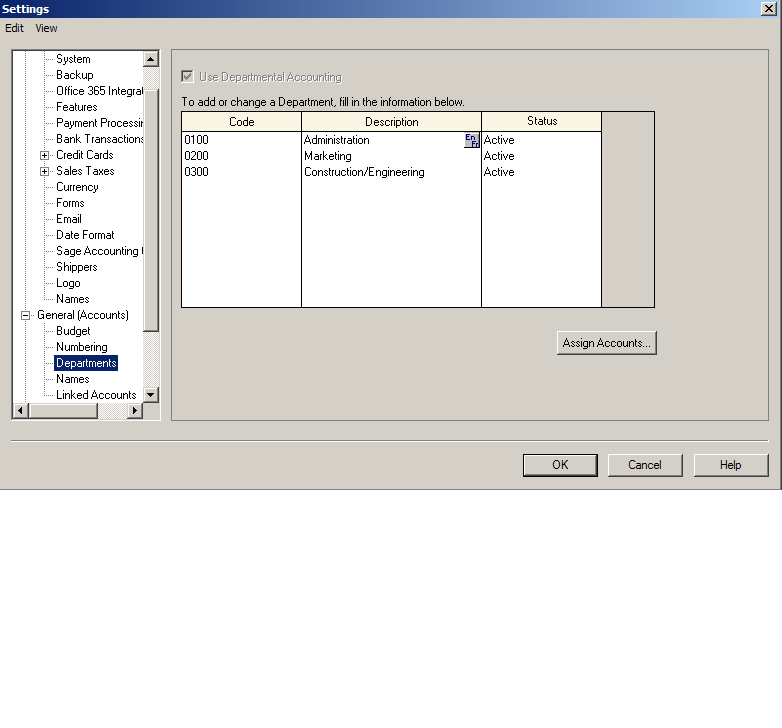
Next: Departments
Some companies need to separate departments and capture each departments expenses and income separately.
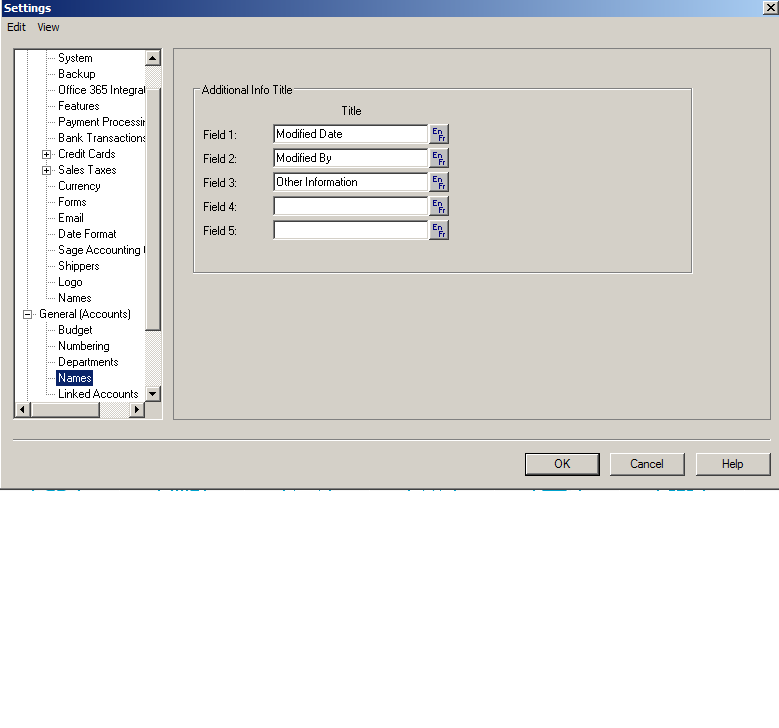
 Next: Names
You can put anything you need to track in Names. this field can be used to sign off on documents.
Next: Linked Accounts
This section is the integration section of Sage. Enter the account number for Current Earnings so that the system with know the account to used for Net Income or Loss calculations.
there is a Charges and Income section. If you add account number to this section it will use it for any over or underage that may occur during bank reconciliation or un-balanced transactions. I have left this blank because I want to choose the account rather a automatic entry.

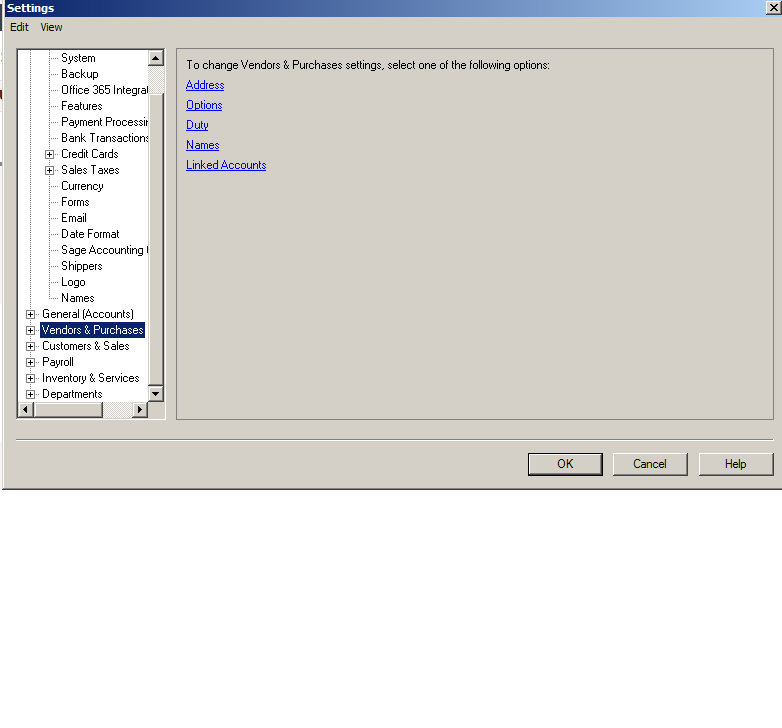
Next section is Vendor & Purchases with 5 sub sections t0 cover.
Address, Options, Duty, Names and Linked Accounts.
 click on addresses
This is very handy and limits typing. enter a default address for new vendors.
Next: Options
Aging and Early payment terms.
Next: Duty
If your company imports or exports product the account that captures Duty can go here.
Next: Names
this Section is for Additional info titles and terminology.
if you like the Name Invoice to read Bills or Vendors to be called Suppliers, it can be changed here.
Next: Linked Accounts
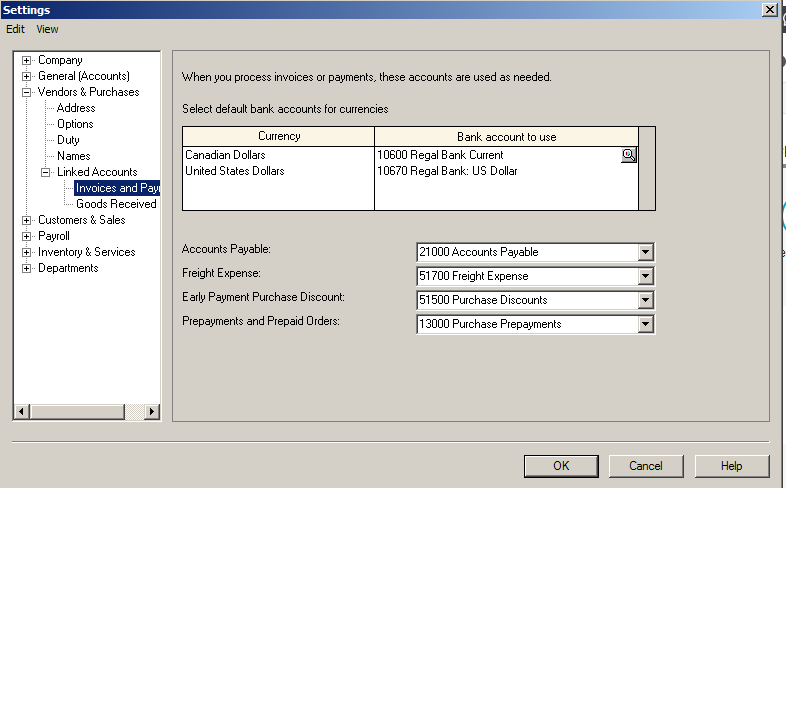
This is 2 part integration section. The account numbers given here will be used to record transactions accordingly. the 2 parts are:
1- Invoice and Payments
2 – Goods Received Notes
Now, depending on what version of Sage Simply Accounting you have,
The Goods Received Notes may not be an option.
Lets first look at Invoice and Payments.
enter the bank account information and currency.
enter all the account numbers you created in the chart of account for these section. depending on your company some of these sections will be left blank.
not all companies give early payment discount or prepayment on orders. so fill out what is required for your business.
Next: Goods Received Notes
If your company is in a habit of producing Goods Received Notes and you like Sage to keep track of them, enter the account number here. Keep in mind to review these accounts often and purge out any notes not needed.
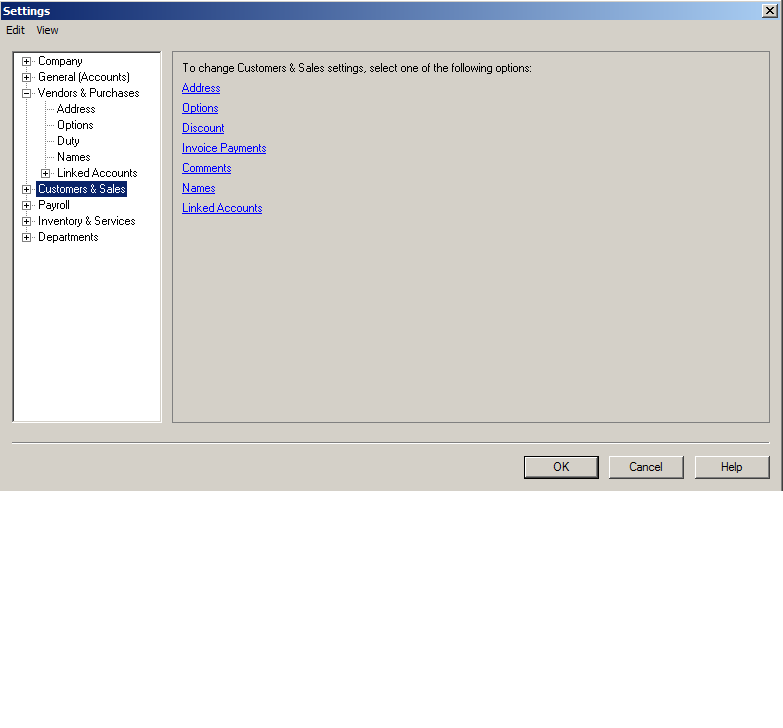
Moving on to Customers & Sales
this section has 7 sub sections to cover.
Address, Options, Discount, Invoice Payments, Comments, Names and Linked Accounts.
Next: Address
Enter the default address information for new customers.
Next: Options
Frist part of Options is Aging – normally customer invoices aging is 30 to 60 to 90 days.
Second part is Customer Statements – to set up interest charged on past due invoices as well as report options.
final section is tax code – this is a default tax code for new customers and if you need to track sales reps for commission purposes.
Next: Discount
Early payment discount – enter percentage discount paid within a certain date.
and this discount can fall on a line item for sales transactions.
Next: Invoice Payment
this is an online payment method. A 3rd party company register with a fee attached,.
you can contact Sage and install the 3rd party software compatible with Sage.
Next: Comments
The comment section is to make your invoices friendly. ex: A note thanking customers for their business. as well as for Contracts, Estimates and Delivery Orders.
Next: Names
Additional info Titles and Terminology. ex: change Customers to Clients or Sales to Service.
Next: Linked Accounts
This section has 2 sub sections:
1- Invoices & Receipts
2 – Delivery Orders
From the top enter the bank accounts for customer deposits and the second section is the linked accounts for Sage to track Accounts Receivable, Default Revenue, Freight Revenue, Early Payment Sales Discount, Deposits and Prepaid Contracts, Online Payments Receivable and Online Payments Fees.
Notes: Keep in mind you may not utilize all these sections depending on your business type. There might be unused sections so leave them blank.
Next: Delivery Orders
delivery orders are processed Sage can keep track and this is where the account numbers will be defined. Reconcile these accounts on regular basis to purge what is not needed.
This concludes P2 of this tutorial.
In part 3 will look at payroll and the link is blow for your review.
http://www.simply-accounting-tutorial.ca/category/payroll-cheque-run
Merge Two Customers with Same name together
this tutorial is how to combine or merge two customers together.
if you have created a customer by name of Ben and again by name of Benoit but they are same company you can do the following.
go to customer records:
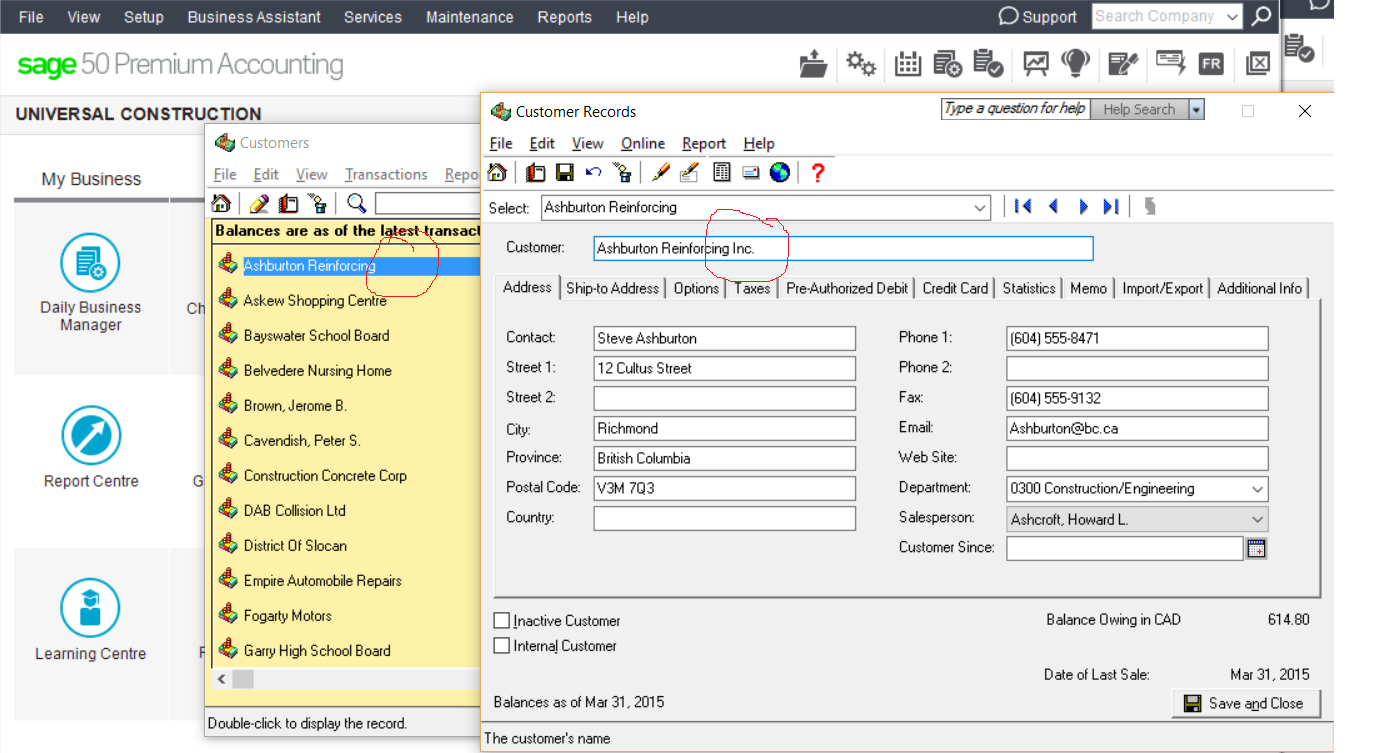
Where I have circled red is where the change is. for the current customer in yellow field I do not have Inc. at the end of the name but I add it to the Customer section of the name.
you can do the same. call up the customer Ben and change it to Benoit. Keep in mind the system will complain because now you have 2 names the same. so just add a TEMPORARLY character or number to satisfy the system for now and click save and close
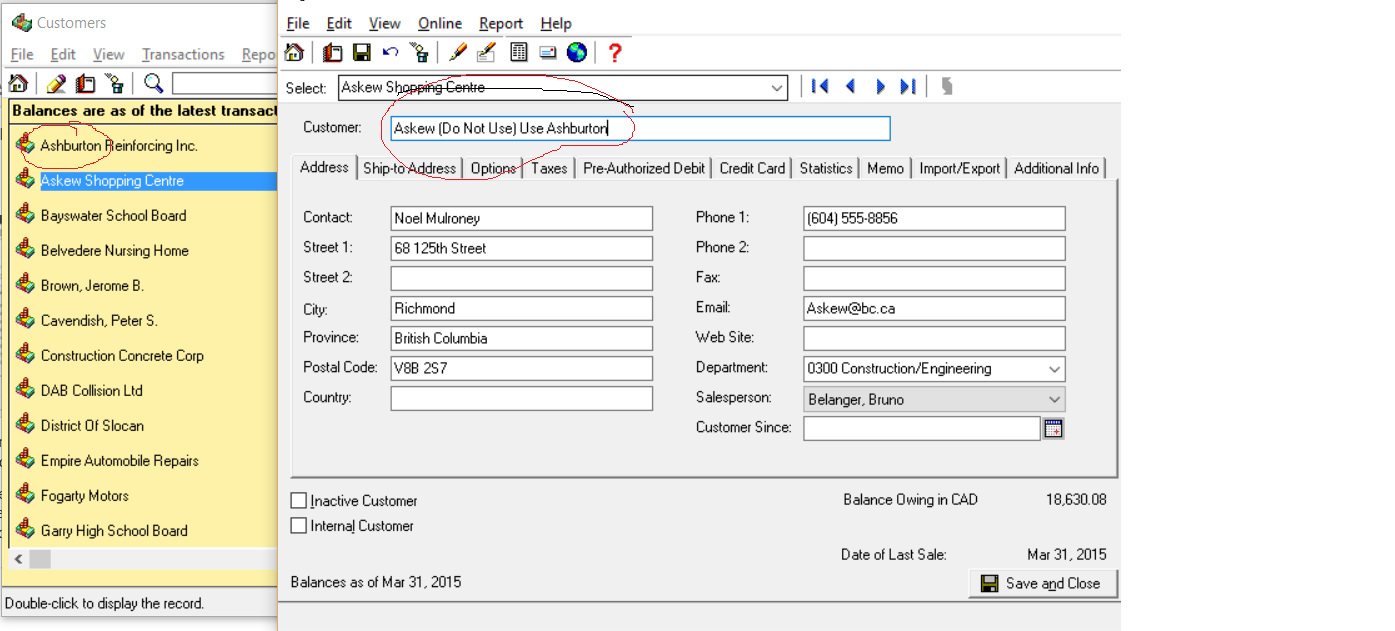
No call up customer Benoit and after the name add (Do Not Use) use Ben.
Like this.
Now you have separated the customers. you can transfer invoices from one to the other.
open the Receipts |Journal and click on the invoice you need to transfer.
Click save and close.
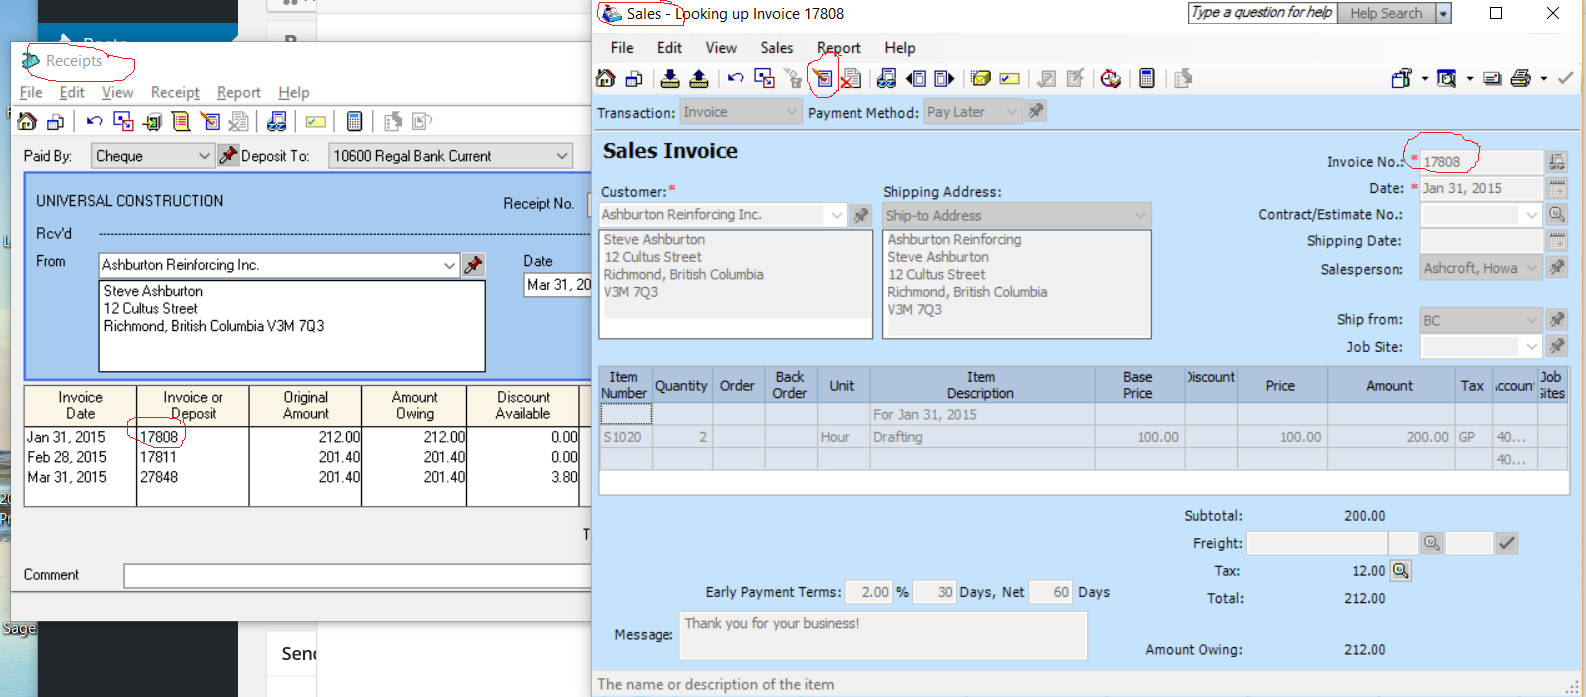
From here click on the red pen. hover your mouse over it and it will say adjust invoice.
this will release the invoice and allow you to make changes.
drop down the customer name and choose the one you need.
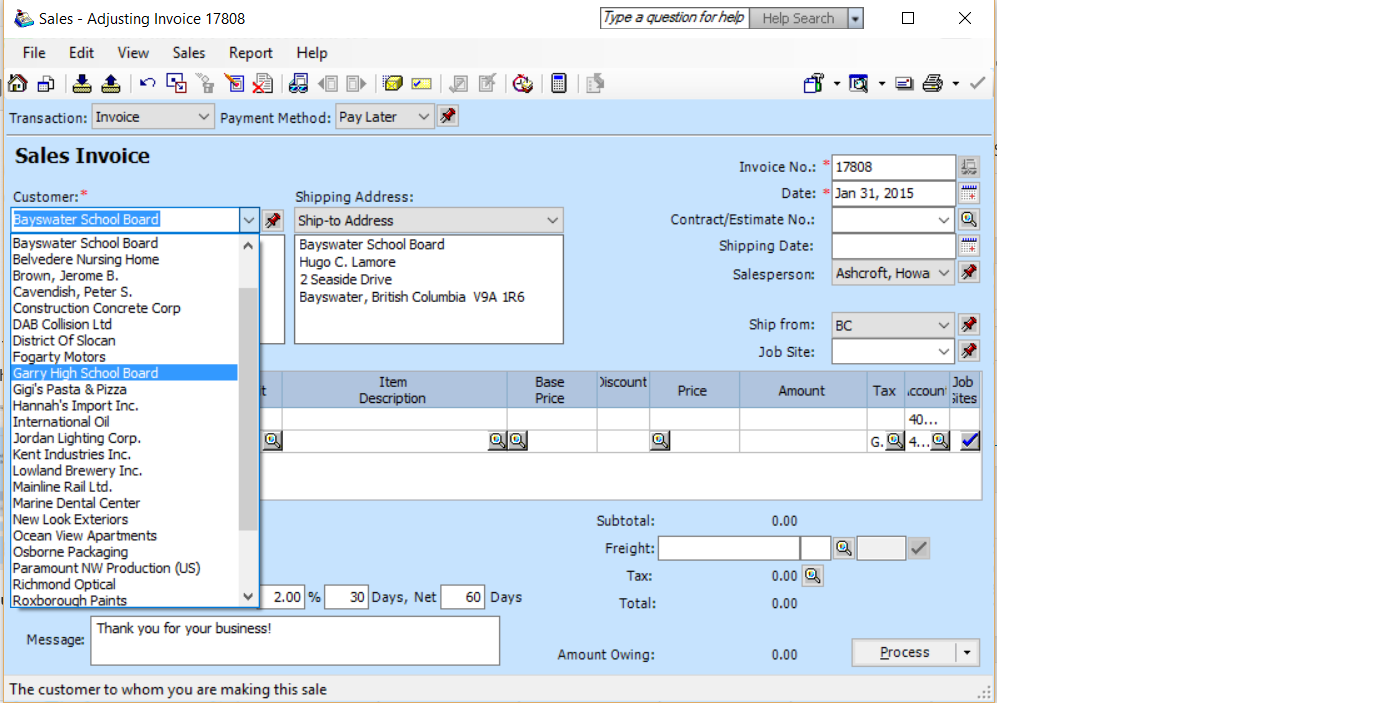
Now you have organized your customer list and moved all invoices over to the correct customer.
Hope this helped.
Leave me a note or if you have another question let me know.
mk