Merging Two Companies Together
This was an interesting question where sometimes you need to merge 2 companies financials into one data base.
Either the Chart of Accounts can be utilized to accommodate the new company by issuing new set of account numbers.
or
The Project section of Sage can be used.
This tutorial will show you how to use and change the Project name to Departments so it makes more since in this instant.
at the home page drop down the Setup menu and choose Settings than Projects.
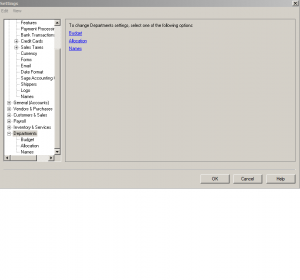
here you have three choices, Budget, Allocation and Name.
lets change the name from Projects to Departments.
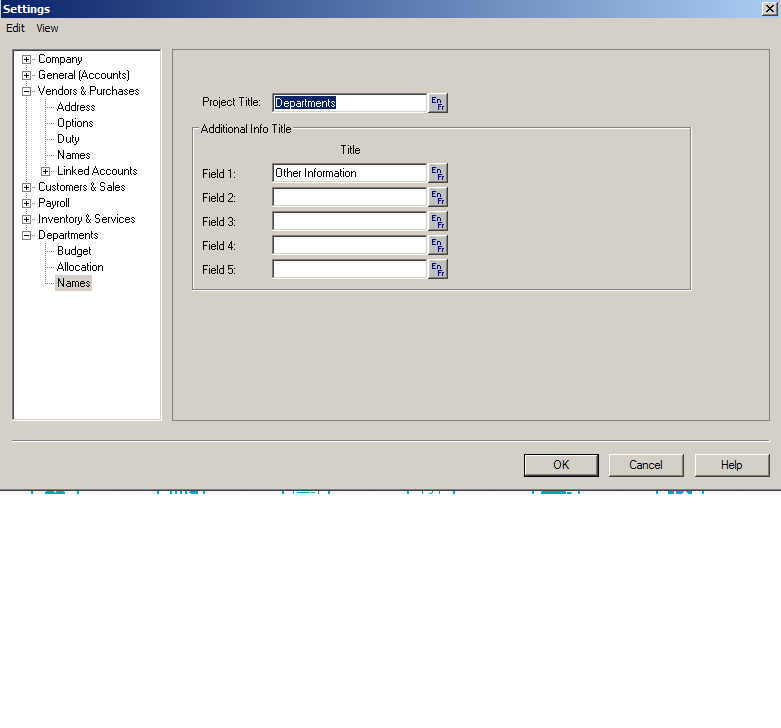
press OK to Save.
Now its time to go into the Chart of Accounts and allow allocation for each appropriate account number.
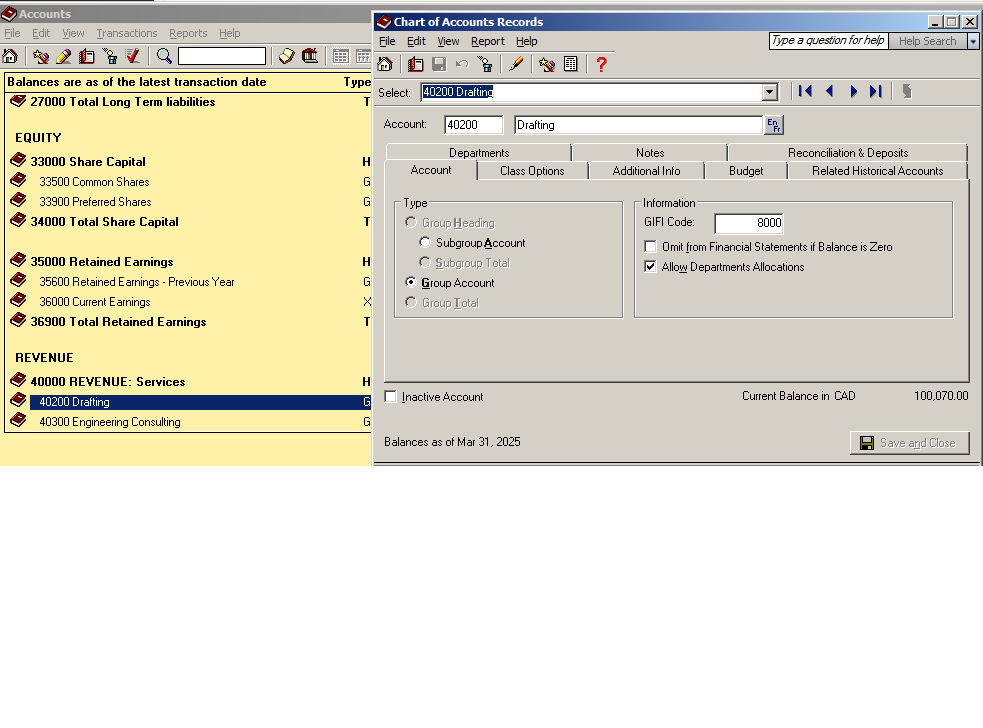 once that is done you can start posting entries and allocating.
To obtain a report, from home page drop down Reports menu – Department – Allocation.
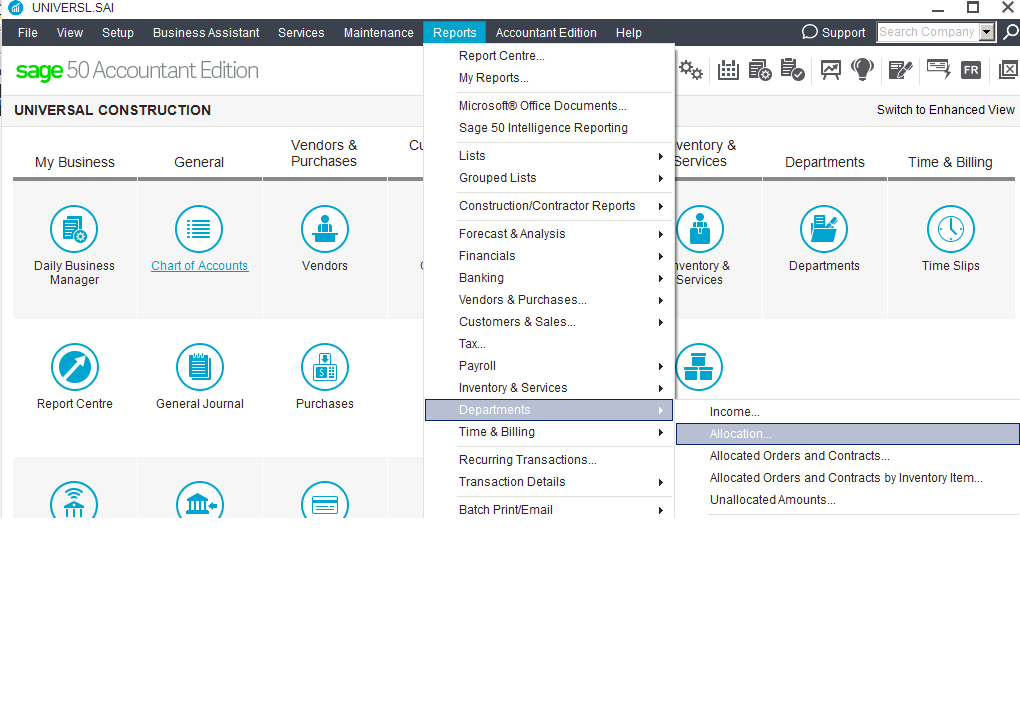
Here is what shows up for department allocation. Click OK to see the report.
 Hope this tutorial helped.
Let me know if you have any other questions.
nk
How to create a Purchase Order
This tutorial is how to create a purchase order in Sage 50.
I am using Sage 50 version 2018 Premium.
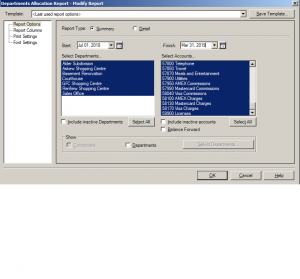
I am in the Classic mode you can change the home screen mode by clicking the top right hand corner of the home screen.
Now if your using the Purchase Order module for the first time, decide what number you want it to star at.
I will start at number 1000. Sage 50 will save that number and advance numerically with each purchase order recorded.
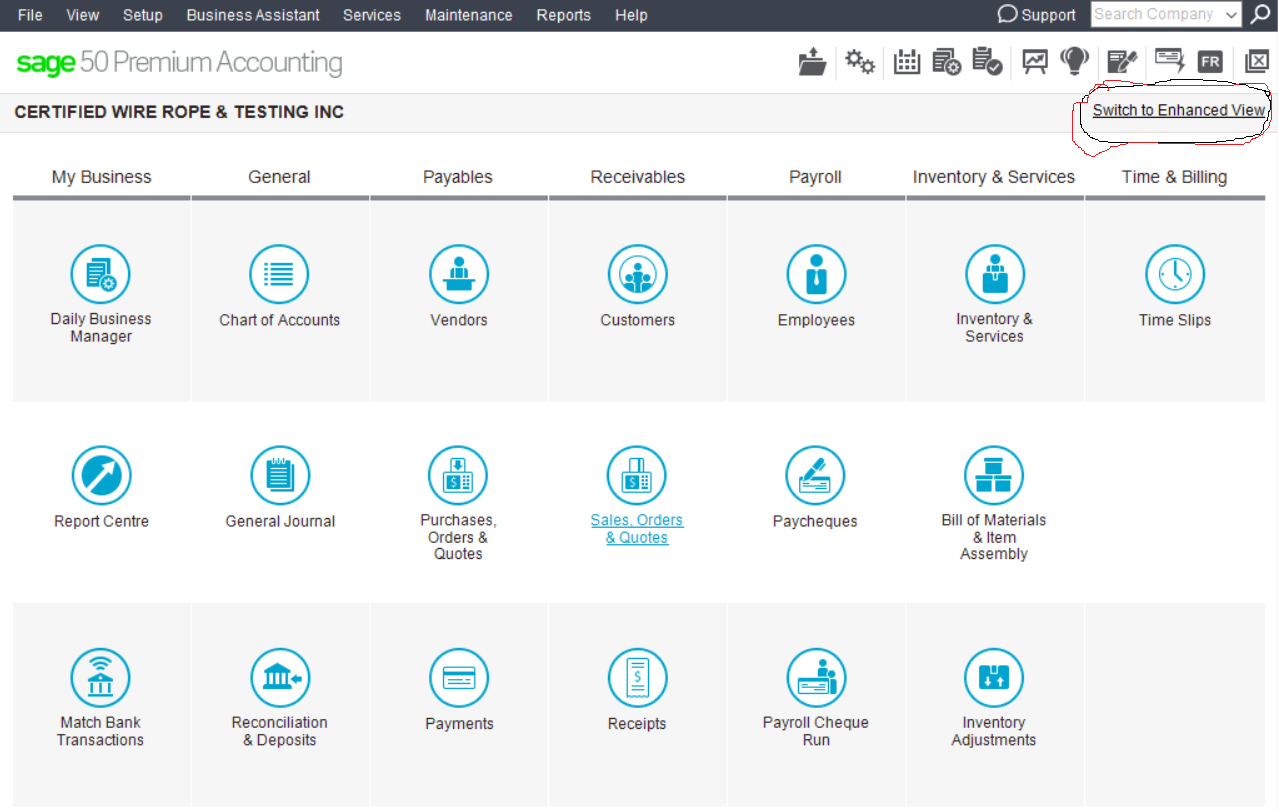
Lets click on the Purchase Order & Quotes module.
You can create your order.
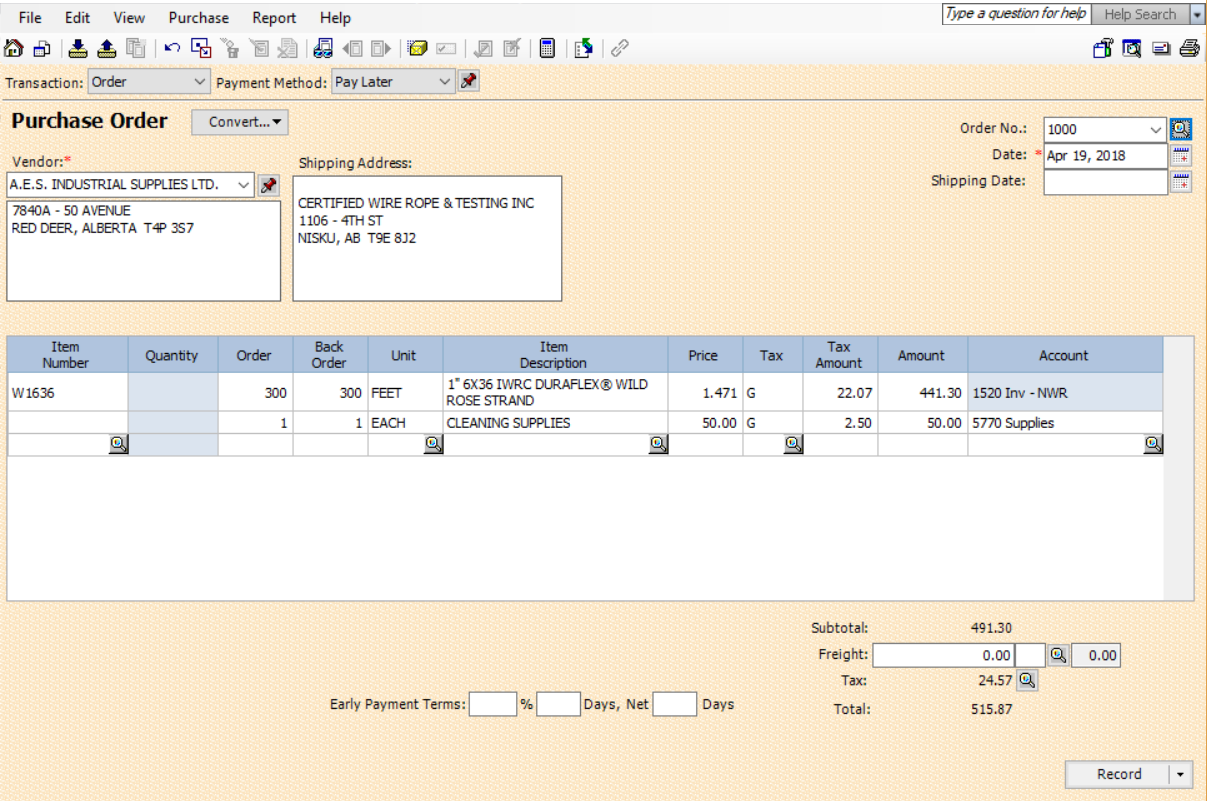
From the top – drop down the Menu beside Transaction and choose Order.
Payment Method should be pay later.
Order number is 1000
Date is todays date or you can give it a previous or future date.
Choose the supplier your ordering goods from.
If you use the inventory module and have all your inventory recorded you can choose the item or place a non-inventory item.
I have both recorded for you to see how it works and the account numbers that it will go to.
If you choose an inventory item the account number is an asset account to track your inventory.
And if the item is non-inventory the account is an expense account.
Once the order is entered, it can be emailed directly to the supplier’s email address or you can print and fax to the supplier.
click process to record the purchase order.
By processing, it will not be posted until the invoice is recorded.
You will call up the same purchase order # (1000) and convert it to an invoice.
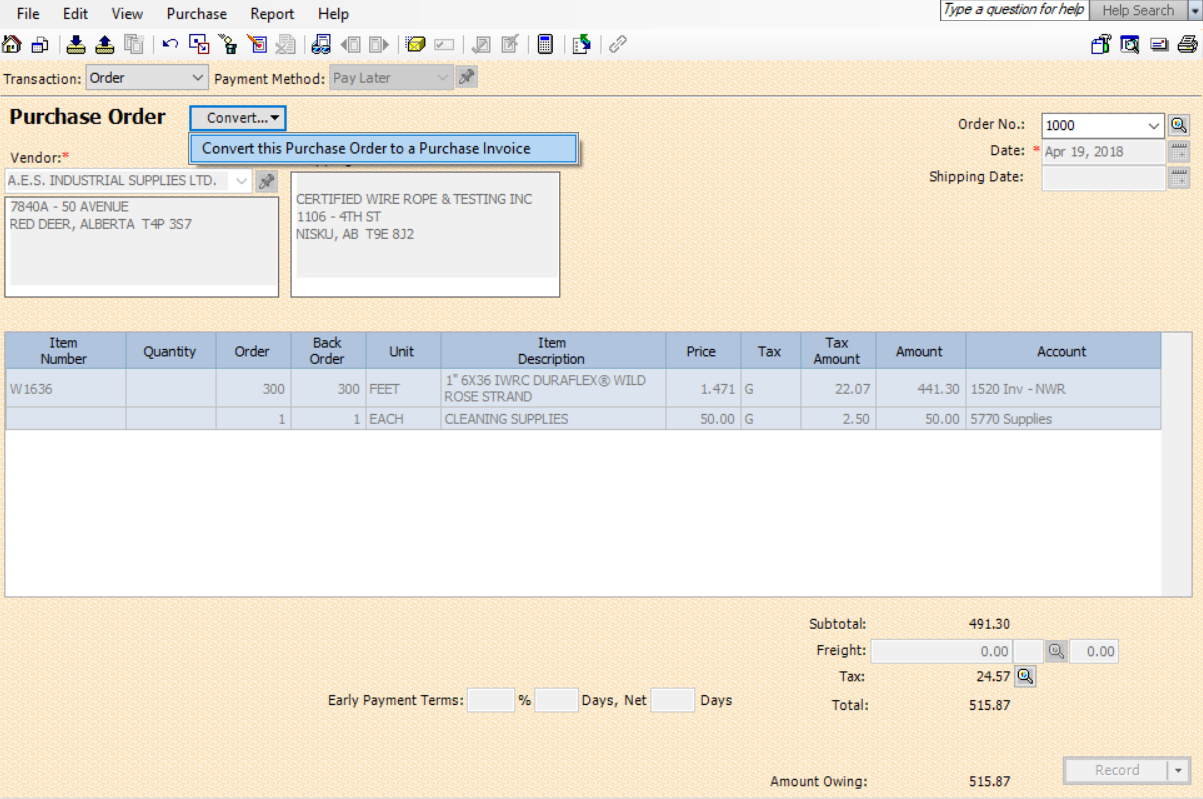
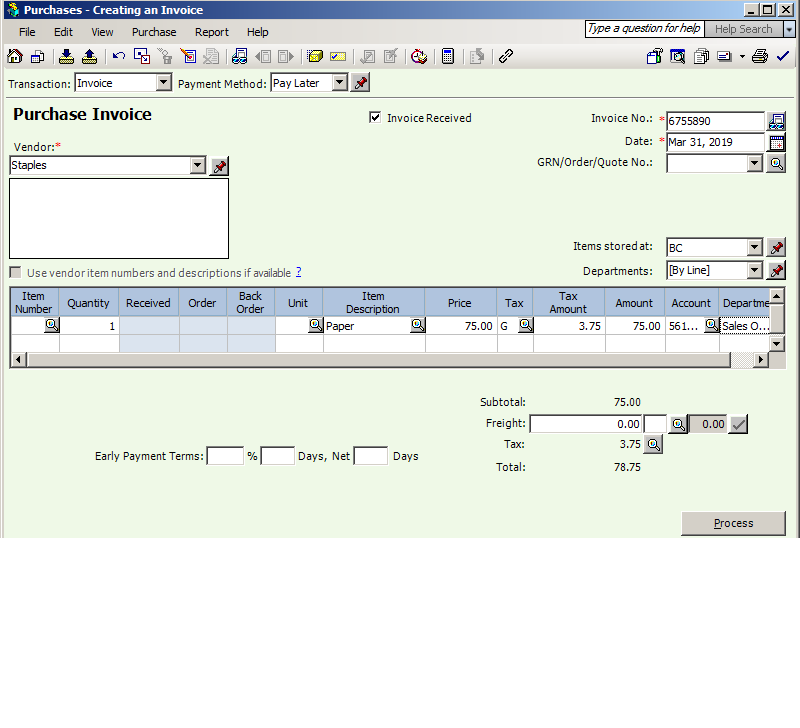
Below is the PO that is converted to an invoice.
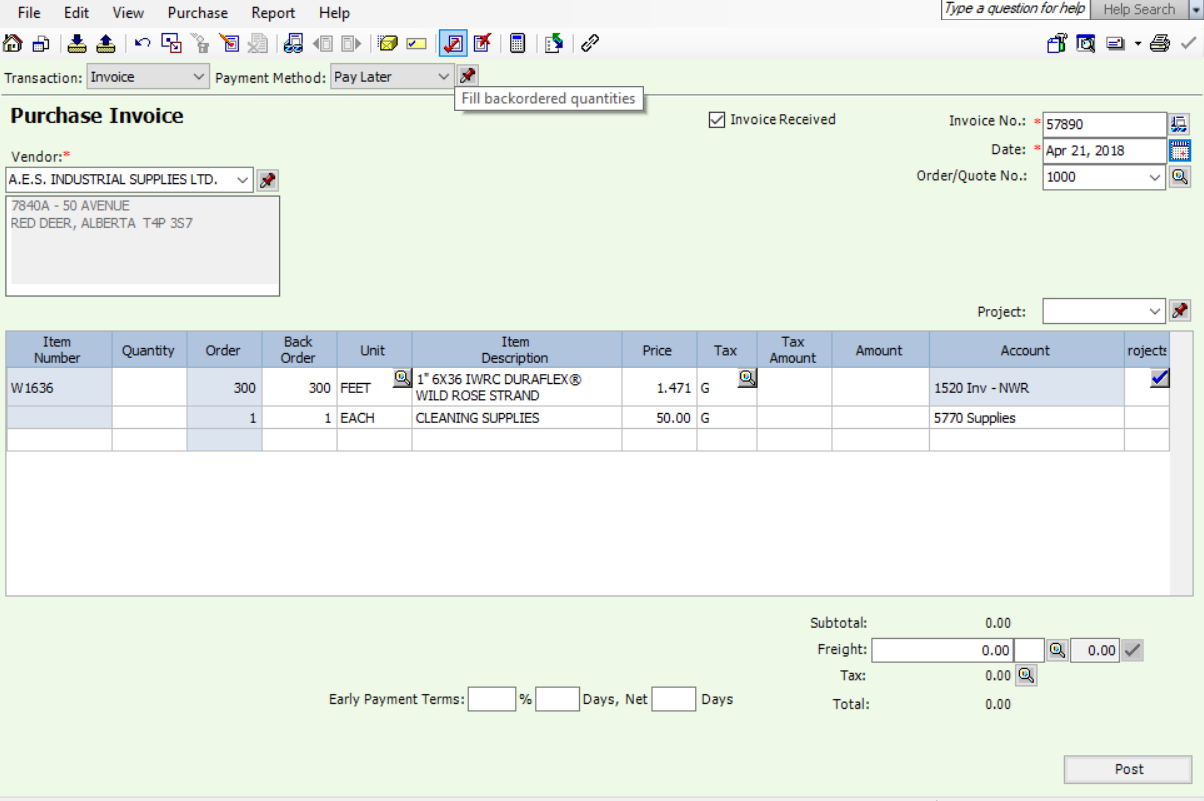
If all the items have been received you can check off the red Check Mark and fill all the back orders quantities. or enter each item that you received and leave the rest on back order.
Fill in the invoice number and invoice date.
Make sure the total matches the supplier invoice and Record.
Hope this tutorial helped.
If you have any other questions I look forward getting them
nk